DIY Clock-Weather-Plus Part 4
We wrap our DIY Clock by assembling the hardware, and customizing the Raspberry Pi’s software to run our clock.
This post is part of a series in which we’re building our own DIY clock with weather capability. In part 1 of the DIY clock series, we created the clock screen using straightforward web front-end programming. In part 2 of the DIY clock series, we created our own weather screen utilizing the Dark Sky weather API and Skycons for weather icons. In part 3 of the DIY clock series, we decided what hardware to use for our project.
The hardware has now arrived, and in this post we’ll finish the build and get our software running on our DIY clock plus weather plus ?
DIY Clock Hardware
To review, here are the components we’re using to build the clock:
| Item | Cost |
|---|---|
| CanaKit with Raspberry Pi, power supply, WiFi, network, clock,… | $46 |
| 7″ Touchscreen | 64 |
| Case for screen | 28 |
| Back for case (which it turns out we don’t need) | 7 |
| Total | $145 |
I also ordered a 32GB micro SD card for the Raspberry Pi. The first thing to do is to format the micro SD card, and then download the NOOBS software and copy it onto the card. The process for this is well-documented, and summarized in this video from Geek Gurl Diaries. Note that we’re not powering on yet, just copying the files to the card and getting the card into the Raspberry Pi.
Once the files are copied to the card, eject the card from your PC and install it into the micro SD card slot on the underside of the Raspberry Pi PCB.
Assembling the DIY Clock Hardware
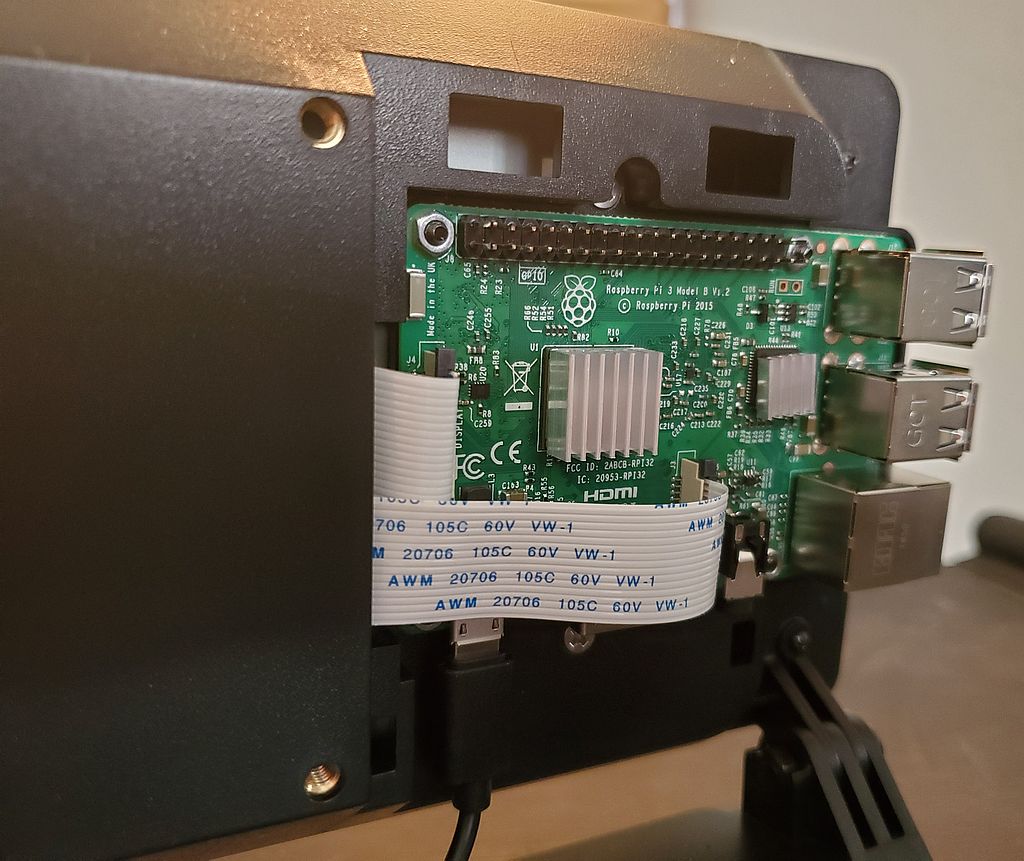
Once the card is programmed and installed, start installing the display into the case, and then mounting the Raspberry Pi itself into the case. That process is well documented with images and clear instructions at smarticase.com. The instructions include the connection for a camera, which we didn’t use, but did install the cable for in case we want to add it later. The display and Pi fit well into the case, I was pleasantly surprised at how well it all went together. A couple of notes – install the memory card in the Pi before you install the board in the case, and beware that the cooling fan connections for the case interfere with closing the back cover. In reality, I don’t think we’ll need the cooling fan.
One disappointment was that the description on Amazon’s website led me to believe I needed to order a separate back for the case. In fact, it comes with the shallower of the back covers, two of them actually (for fan and no fan configurations). There’s no need to order the deeper back cover unless you are stacking boards on top of the Raspberry Pi board. It looks like the deep cover is going back to Amazon.


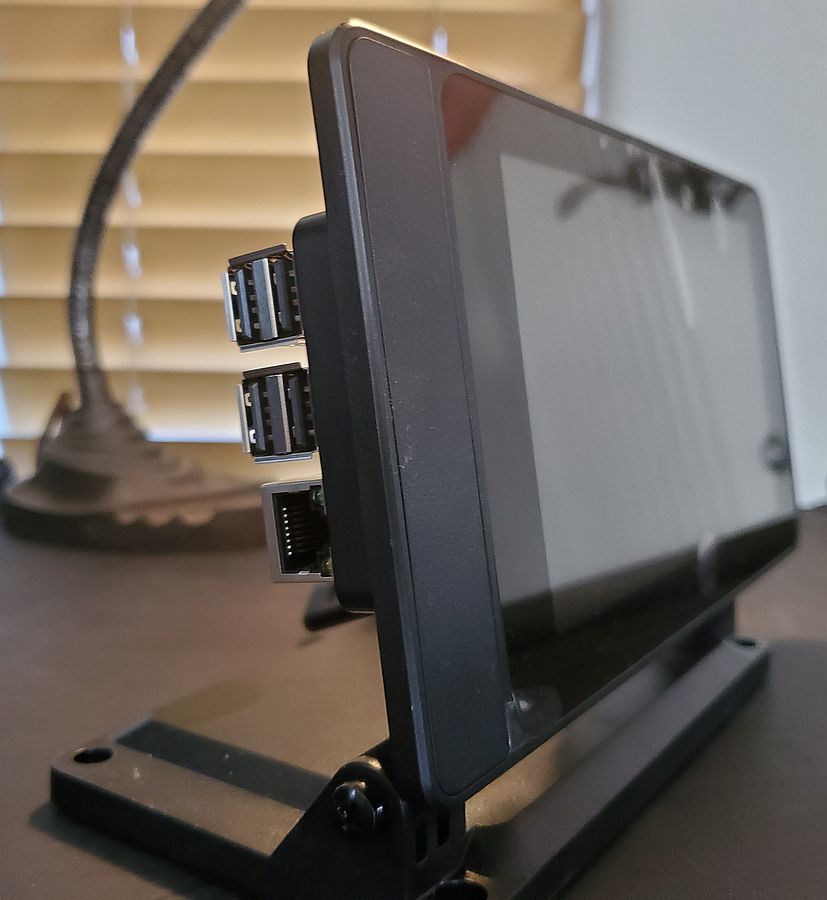
The back panel isn’t attached in the photos, by the way.
I connected a USB keyboard, a USB mouse, an Ethernet cable, and an HDMI monitor before powering up. I wasn’t sure if the Pi would use the 7” display right away, or if I would need to start on an HDMI monitor and configure the screen. It started out using the 7” screen with no trouble, and I never needed the HDMI monitor.
Configuring the DIY Clock
I went through the setup process, installing Raspbian. I setup my wireless network at the prompt, since I’ll run it from that network after I get it set up. The updates took a very long time, I thought it had locked up once or twice during the process, but it was fine. When you have a fiber connection and 100MBps Ethernet, you start to get impatient when downloads take more than a few seconds, I’m spoiled that way I guess.
Once the unit was up and running, the first thing I did was to enable SSH and VNC. I want to be able to work on this device from my desk, no matter where the clock is in the house. Enabling VNC in Raspbian is simple, from the menu, go to Preferences > Raspberry Pi Configuration. In the configuration tool, select the Interfaces tab and enable SSH and VNC. Click OK. You will be prompted for a reboot in order for the changes to take effect.
I then downloaded the VNC Viewer and installed it on my main computer, and logged into the Pi from my desk. Using VNC, I can access the graphic desktop on the Pi. I have PuTTY installed as well, so can log in to a shell (command line) remotely as well.
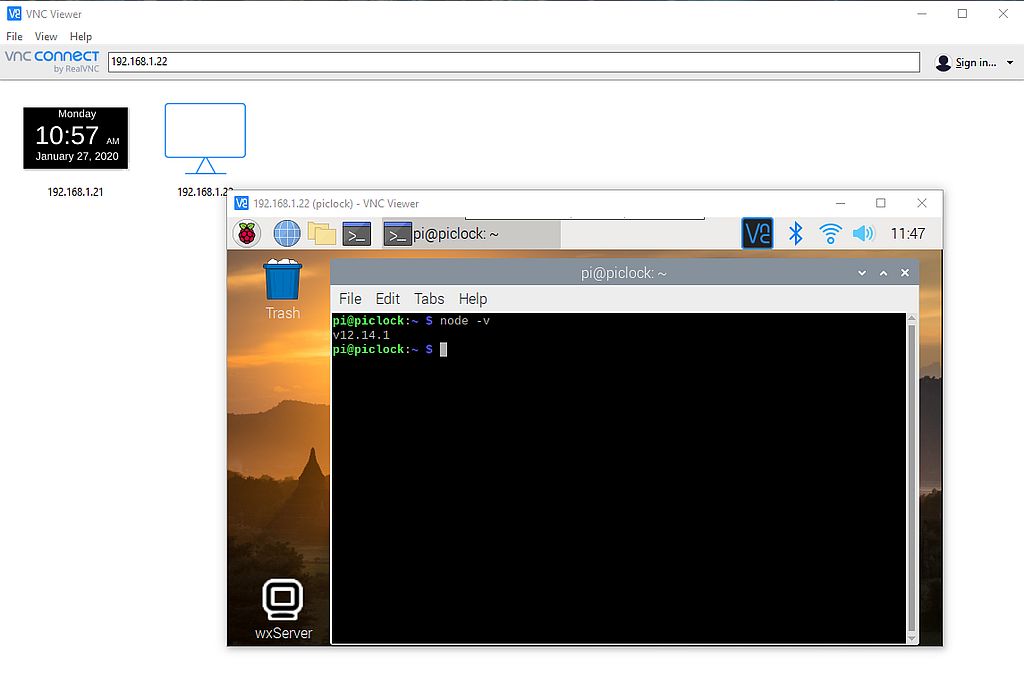
Since the weather information in our project is retrieved by a Node.js server, we need to install Node.js on the Raspberry Pi. I found an Instructables article on installing Node.js and Npm on Raspberry Pi that walked me right through the process. The only update I would have on the article is that the node.js tarball is now a .xz instead of a .gz. For those unfamiliar with the in’s and out’s of the tar command, the command line options to extract the file given in the article need to be updated. The command to extract the file is ‘tar -xJf <filename>’ instead of ‘tar -xzf <filename>’.
At a terminal prompt on your Raspberry Pi, type ‘node -v’ to see the version of node.js and ‘npm -v’ to see the version of npm installed, confirming that they are installed. Now we need to move the front-end and server files from our local PC to the Pi.
WARNING: Do NOT install git on Raspbian using the command ‘sudo apt install git-all’! This is the command in the git reference book. I did this, and it uninstalled _a bunch_ of packages on the Pi, and installed far more stuff than I would have needed to clone my code from a git repository. Links in the GUI were broken, and finally after a reboot of the Pi, I could not get back to the GUI.
If you want to use git, do some research to see what’s appropriate for installing it on Raspbian. I ended up having to revert to the NOOBS loader, re-install Raspbian, re-update everything, and make my way back to this point. I’m really glad I was taking notes for this post since I had to do it all over again. And I’m really glad I had used NOOBS, because otherwise I would have had to disassemble the board from the case to get the micro SD card out and re-flash it. Crisis semi-averted by NOOBS.
Adding the DIY Clock and Weather Code
The clock and weather screens we created were based on a 1024×768 display. This display runs at 720×480 by default. To change it, go to Preferences > Raspberry Pi Configuration, and on the first tab (System), select the button labeled “Set Resolution…”. Select the 1024×768 option on the dropdown, click OK, and reboot for the change to take effect.
The next thing to do is to create a directory to put the server javascript and data files into. I created a ‘wxServer’ directory, and used VNC to transfer the files from my PC to the wxServer folder. I just put the folder under /home/pi, so in /home/pi/wxServer/ I have wxServer.js and I copied the last wx.json data file from my PC (we created these in Part 2). In the wxServer.js code, we used a module called node-fetch, which is not installed on the Raspberry Pi. We have npm installed though, so we can use that to get it set up.
Open an lxterminal window on the Raspberry Pi (from your PC if you’re VNC’ed into it) and change to the wxServer directory. Type ‘npm init’ to initialize the project and create a package.json, package-lock.json file, and a node_modules directory. Then simply type ‘npm install node-fetch’ to install the node-fetch module. The weather server is all set. Launch it by typing ‘node wxServer’.
Now create a directory for the clock and weather front-end files. I created a /home/pi/clock/ directory, and copied all the html, css, and js files into it.
Now just open the Chromium browser and load the clock.html or wx.html page.
I’ve registered event handlers for ‘touchend’ and ‘click’ events in each Javascript file (clock.js and wx.js) to load the other html file. So if you’re looking at the clock and you click a mouse or tap the screen, the weather page loads, and vice versa. Just tap the clock to switch back and forth.
Even after putting the browser into full-screen mode, and increasing the display resolution to 1024×768, not everything fits like it did on the PC. I had to some fiddling with CSS to get everything on the screen without the need to scroll. I also took out a lot of the weather information to fit the more compact form factor. Even so, I get all the essentials in one screen. Here’s the overhauled weather screen:
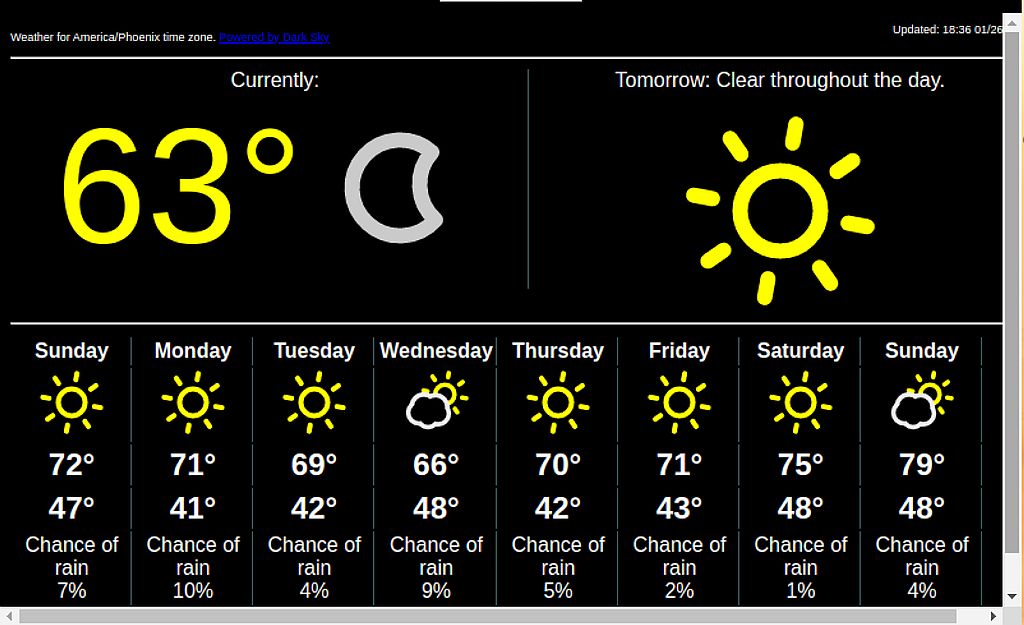
Everything looks pretty good at this point. Now to make this device act a little more like a clock and less like a computer, at least from the outside. I want it to to start the wxServer at boot, and then start Chromium in full-screen mode with clock.html loaded. Also, I need to turn off the screen saver. I noticed the clock screen goes black after a while.
Disabling the Screen Saver on Raspbian
In order to prevent the screen from going black after several minutes, we need to disable the screen saver function of X, which is the window manager in Linux. We do this with the command ‘xset’, which we run as a superuser.
$ sudo xset s off
$ sudo xset -dpms
s is the command line switch for screensaver, which we set to off.
-dpms disables Energy Star features, which when enabled specify the time delays for standby, suspend, and off modes for the display.
Starting the Weather Server Automatically
In order to start the weather server, I want a script that will check to see if the server is running or not. If it is, then I don’t want to start another instance of it. If it isn’t running, the script should start it. Here’s what I came up with:
#!/bin/bash
exist=$(ps aux | grep [n]ode);
if [ ${#exist} -lt 5 ]; then
        echo 'Starting wxServer'
        /home/pi/node-v12.14.1-linux-armv7l/bin/node /home/pi/wxServer/wxServer &
     else
        echo 'wxServer already running, skipping.'
fi
The first line indicates this is a bash script, to be run as if at an lxterminal command line in other words. Line 2 runs the ‘ps aux’ command which lists all the running processes, then pipes that output into grep, which looks for lines containing the regular expression ‘[n]ode’. This will return any lines containing ‘node’, but exclude this command itself from the results since it literally says ‘[n]ode’ and not ‘node’. Without the []’s we would always get a result which included this command itself, because it will be running while it’s running, right? OK, so now we have a string which contains ‘node’ if there is one in the list of running processes, and that string gets assigned to the variable ‘exist’.
Line 3 checks to see if the length of ‘exist’ is less than 5. Five is arbitrary, because ‘exist’ will be either 0 characters long (node is not running), or pretty long, like 75+ characters depending on its PID, path, etc. I just picked some low number.
The rest of the script starts the wxServer using node if ‘exist’ is less than 5 characters (node isn’t already running), and runs it in the background (‘&’) so the terminal window can close. If ‘exist’ is over 5 characters (node is running already), it just echos a message to that effect and exits.
Now, since we don’t have a keyboard on our clock, we’ll put an icon on the desktop to launch the server using our script so we can tap and launch. To do that, create a file ‘/home/pi/Desktop/launchWxServer.desktop’, and in that file, put this:
[Desktop Entry]
Type=Application
Encoding=UTF-8
Name=wxServer
Comment=Weather server
Icon=/usr/share/icons/HighContrast/32x32/devices/computer.png
Path=/home/pi/wxServer/
Exec=sh /home/pi/wxServer/startServer.sh
Use any icon file you wish, of course. I just picked something already included in Raspbian. Change the Path and Exec lines as suitable for your installation. The Exec line runs the ‘sh’ command which runs a shell script. We pass it the argument of our shell script created above. Now the icon will appear on the desktop, we can double-tap it and the weather server will be launched if isn’t already running.
Now, to run that script and start the server every time the Pi boots, we place the same content as above in a file at /home/pi/.config/autostart/launchWxServer.desktop. This will run our script and load our server, after the GUI loads, every time the Raspberry Pi boots.
So we have created these files:
- /home/pi/wxServer/startServer.sh – a bash shell script to start the server if it isn’t already running
- /home/pi/.config/autostart/launchWxServer.desktop – runs our script after the GUI starts at boot
- /home/pi/Desktop/launchWxServer.desktop – same file but on the desktop where we can tap it and run it from the GUI without a keyboard. We shouldn’t need to start it again, but … who knows?
Starting the DIY Clock
To start the chromium browser with the clock loaded, in fullscreen mode, the bash script is simply:
#!/bin/bash
chromium-browser --start-fullscreen file:///home/pi/clock/clock.html
I’ve put that into a shell script in a file /home/pi/clock/StartClockOnly.sh. On the desktop I created a new file called launchClock.desktop and included these lines in that file:
[Desktop Entry]
Type=Application
Encoding=UTF-8
Name=Clock
Comment=DIY Clock and weather
Icon=/usr/share/icons/HighContrast/32x32/devices/computer.png
Path=/home/pi/clock/
Exec=sh /home/pi/clock/StartClockOnly.sh
In a new file at /home/pi/.config/autostart/launchClock.desktop I added the same lines. That way when you plug it in, it just starts because it’s in the autostart folder. We have a copy of it on the desktop (/home/pi/Desktop/) so that if we’re working on the Pi and want to restart the clock in the browser, we have a tap-able icon for it on the desktop.
A shell script to start the server, and a .desktop file to run the script, both automatically at boot, and by double-tapping on the desktop. The same for the clock. Now when we plug the device in, it boots, starts the weather server, and displays the clock. No keyboard or mouse required, it just works.
Is the DIY Clock Complete?
It’s doing everything we set out to do. It acts like a clock when we plug it in. It’s readable from across the room at 2:00am with bad vision, I can attest to that. Tapping on the clock screen shows us the up-to-date weather information in an attractive format. Tapping again returns to the clock. We spent more money than one should on a clock, but we have infinite flexibility. It is a self-contained computer, connected to our WiFi network. We literally have the world at our disposal.
I’ll say that the DIY clock is done for now. It will probably be a week or so before I can’t resist the urge to add more screens to it. News, calendar, image of the day, traffic, my email inbox, a tropical webcam feed, who knows?
If you’ve followed this series and are interested in more detail, please let me know. I’d be happy to share more details of the implementation. If you’re making your own, I’d love to hear about it.
If you want to start from the beginning, In Part 1 we create the clock front end, in Part 2 we create the weather server and front end, and in Part 3 we review our requirements and decide on our DIY clock hardware.
Hi, Could you post the completed files? I have built the Pi with the touch screen, installed all the additional software. But cannot figure out the coding. The HTML clock file is only partial. What name should I save the CSS and JS files as, and are they complete or snippets? Is it the corrected file? Later in the article you said you had to edit the earlier version of the CSS. I’m sure I’ll have more questions with the weather station but I’m still stuck on the clock.
Thanks,
Steve
Hi Steve – I’ve been using for a while now and have made a few tweaks over time. I’ve posted the clock and weather front end files on GitHub so they’re easily accessible. The weather screen utilizes some server code too. I’ll get that up there soon. Here’s a link to code Raspberry Pi Clock and Weather