DIY Clock Hardware
DIY Clock-Weather-Plus Part 3
It’s time to select hardware for our DIY Clock-Weather-Plus. We’ll look at displays, Arduino, Raspberry Pi’s, real-time clocks, and more.
We’re building a DIY clock which also has a weather display, and we will be adding yet-to-be-fully-gelled capabilities to it in the future.
In Part 1 of the series, we created the clock screen. Since the hardware was undetermined at that time, we built a web front end using just HTML, CSS, and Javascript. The goal was to get the logic and layout in place, then port to the appropriate hardware.
In Part 2 of the series, we created the weather screen, which was way more fun. We used a third party web API, Dark Sky, to get the weather information. To do that, we created a super-simple server which makes the API call and stores the data in a file on the server. Then we had the server return that file to any browser requesting the proper URL path on the server. Then from the front-end app, we called our server to retrieve the data, and used it to populate the weather screen.
So far, our software structure looks like this:
In this post, Part 3, it’s time to think through how this is all going to come together in terms of physical hardware. I’m a “product person”, I think about almost everything in terms of cost, usability, appeal, specifications, mass-production optimization, yadda yadda yadda. Here’s the challenge with this project: The specifications are open-ended. I keep calling it a “clock-weather-plus” clock. The “plus” means to me that I’m reserving the right to add on all kinds of yet-undefined functionality in the future. You might have thought of some functionality you want to add to your own too. This vagueness means that this project isn’t going to “productize” well.
DIY Clock Specifications So Far
Must-Have’s
Let’s outline our “Must-have’s” (what‘s) in terms of specifications so far.
- We want a clock face that tells the time and day/date simply and clearly from across the room.
- We want weather-at-a-glance, and weather forecast information. These are likely on a different screen to keep the clock face simple.
- We want the screen to be big enough to see the time from across the bedroom, in the middle of the night, groggy-eyed.
- We want the time and weather information to be accurate, within reason.
- We want a minimum of cords running to this thing when it’s done.
- We want maintenance to be minimal or non-existent. It’s a clock, it should take care of itself.
- If there are multiple screens, there needs to be a way to switch between screens.
Let’s see how we have or will implement(ed) these requirements:
- We designed a web page that fulfills this requirement, as long as the physical screen is large enough in the end. Our prototype is 1024 pixels X 768 pixels.
- We designed a second web page that has three areas in it: Currently, Coming-soon, and Forecast. We added very cool Skycons to aid with the at-a-glance-iness (if I may) of the display.
- I wrote the time in big numbers on a 4″ x 6″ index card, and placed it across the room. I believe it’s big enough. A 4″ x 6″ index card has a diagonal measurement of 7″, so we need to select a 7″ screen or larger.
- We’re using the local computer clock to keep time for now. That means our implementation either needs a clock native to it, or we need to add an external timekeeper such as a real-time controller with coin cell battery backup. For accurate weather, we’re using a reliable third-party API, Dark Sky, to obtain our information. We refresh the information on the server every hour, which satisfies the “reasonably accurate” requirement for me. If you want it more frequently, I showed you how to do that in Part 2. Just remember that over 1000 queries a day will cost you actual money, albeit not much.
- We’re relying on a network connection to get the weather information. We also want to be able expand functionality in the future. This means we’ll want Bluetooth or WiFi capability to avoid adding a network cable, and probably WiFi because Bluetooth means we have to connect to something else with a network connection, adding requirements and complexity. Other than that we only need a power cord, assuming solar power and battery banks are excessive.
- Currently, the user doesn’t have to set anything. The time is already set by the host machine. The weather location and API key are coded into the server. Ideally, we can keep the clock that way. Worst case, the user has to set the time once.
- Not figured out yet. I’ve considered a few options: (a) Switch screens automatically, say for 15 seconds at every minute-change. (b) Add a motion or range sensor and change screens when the user waves a hand in front of the clock. (c) Add a camera and do the same thing. (d) Add a button to cycle to the next screen, or a button for each screen, or left and right buttons to cycle through screens. (e)Make it a touch screen and cycle on touch. I played with this a little by loading the clock app on an iPad and switching pages on a “touchend” event. I wasn’t loving it after 5 minutes of work, but it could be honed to work right. There are plenty of options, I haven’t settled on one yet. If you have a clever idea for this, please comment below.
Nice To Have’s
Now let’s outline our “Nice-to-Have’s” for the DIY clock:
- Different people like different clock faces. Tastes change over time. It would be nice if people could easily create their own “skin” for the clock.
- The display may need to “dim” at night. We’ll see how bright it is when we get one. Instead of actually dimming, though, I’m thinking we just change the rendering color of the font from white to a darker shade of gray. We can add a photosensor and react to the room light, or dim by a time schedule.
- Most people don’t live at my house, and share my Dark Sky API key. It would be nice to be able to change the weather location and API key from the user interface.
- I might want to see weather in different locations. I like to look at the weather in my snowbound hometown and get happy about how nice I have it, and then I like to look at the weather in Hawaii and come back down again. Maybe a capability to have user-defined number of identical weather screens, or maybe fix it at a local screen and an ‘Other places’ summary weather screen.
- Extendable – the “Plus” of Clock-Weather-Plus. I want the ability to add more screens in the future and populate them with things like news feeds, my calendar, picture or quote of the day, whatever I dream up. I like the idea of designing the clock as it’s own website (like the prototype we’ve created so far), because it’s super-flexible. In “productization” terms though, we would have to settle on the right screens for the masses, or create a tool for the masses to define their own screens.
- Your ideas – If you have ideas for adding to the functionality of this DIY Clock-Weather-Plus, please sound in on the Comments.
DIY Clock Hardware Selection
The time has come to make some decisions and commit to some hardware. This thing will become less fluid and more concrete now. I started out trying to keep the cost reasonable.
Minimal Cost Approach
We know we need a 7″ screen. Touchscreens cost more than non-touch, so touchscreen is out. LED dot-matrix displays need a lot of power and a lot of pins to control them. Here’s a really decent solution, inexpensive as these go, enough LEDs to do characters and icons, and the controller is integrated so the pin count requirement is low.
The problem is it’s only about 2.5″ square. We would need 6 of these, arranged in two rows of three. So at $78, do we have better options? Yes we do. Here’s a 7″ TFT on adafruit which can display graphics for $38.
The price is so good because it doesn’t have the driver IC, just the 40-pin flex cable. So they made a controller board for that display, and that board is $35. I read the datasheet for the controller, it’s a little tedious to program but possible and does some cool things. So now for the same mid-$70’s price, we have a screen which gives us more options in terms of displaying things. Interfacing to Arduino or Raspberry Pi is straightforward.
Now for the controller. Arduino or Raspberry Pi? Let’s try the Arduino route, because it could be cheaper. We need Wifi, a real-time clock, and pins to interface to the display controller above. I know there are WiFi modules we can add on, so I looked for an Arduino board with a real time controller built in. I couldn’t find one. So we’ll get WiFi built in and add the RTC on. Here’s an Arduino board with built-in WiFi, and they’re 2 for $12:

Now, for the RTC. There are several RTCs on adafruit, ranging from $5 to $18, plus $1 for the battery, which BTW is a great price for a CR2032. They have serial interfaces, so they can connect to either Arduino or Raspberry Pi. By the way, GPS interfaces also give you the time, and solve a problem for the weather location by telling us where the clock is located. But most cost a pretty penny, $30 and up (although I found a GPS module for $13 on Amazon). It’s higher than the $5 RTC, and this is the minimal cost analysis.
So the Arduino option bill of materials looks like this:
| Item | Cost |
|---|---|
| Display | $38 |
| Controller board for display | 35 |
| Arduino with WiFi (have to buy 2-pack) | 12 |
| RTC Module | 5 |
| Battery for RTC | 1 |
| Total | $91 |
OK, yikes! That’s not cheap for a clock. But let’s rationalize by saying this is a prototype. If we wanted to productize this, we could design our own single PCB with everything we need on it and have it built much cheaper. And display cost would drop with quantity of course. I don’t want to compromise on the display size though, since that was the whole impetus behind this in the first place.
But, if we’re going to spend $100 for a one-off prototype, can we get more capability for our money? Yes, we can.
Maximum Capability Approach
We’ve decided that this project isn’t going to make financial sense at this point, and that we’re in the $100 range for parts. What now?
I like the flexibility that the website + web server configuration we have now is giving us. Both the website and web server can be implemented on the same computer, which we did in Parts 1 and 2 on our own computer. That means this whole solution could be implemented on a Raspberry Pi, since it’s an actual computer. We can run Node.js as our server, it has web browsers that run on it, it has a clock, and the networking code stack is built-in. One other thing it has that is helpful to us here, and that is an HDMI output. That means we just show the Pi’s screen on our display and we’re done. No software interface to a display controller. And possibly lower cost display options. It should be cheaper to get 7″ displays with HDMI than with serial or 40-pin native interfaces.
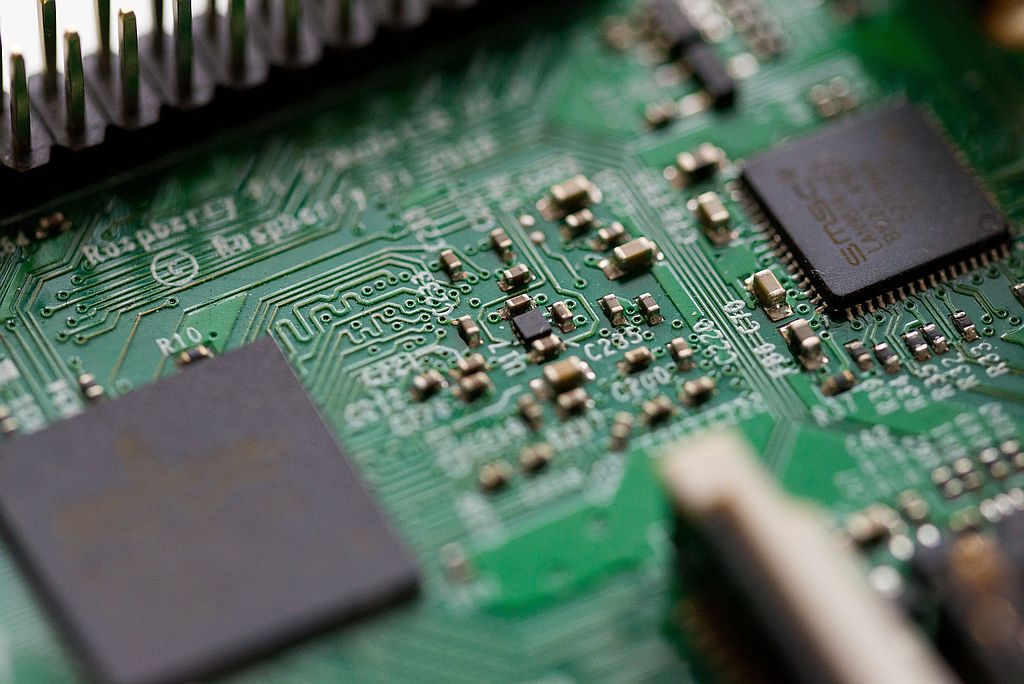
All Raspberry Pi’s should have a clock, so let’s find a one with built in WiFi. Here’s one for $47, which is more than I wanted to spend – however, it includes a power supply, and has WiFi, and has Bluetooth (more options for future expansion):
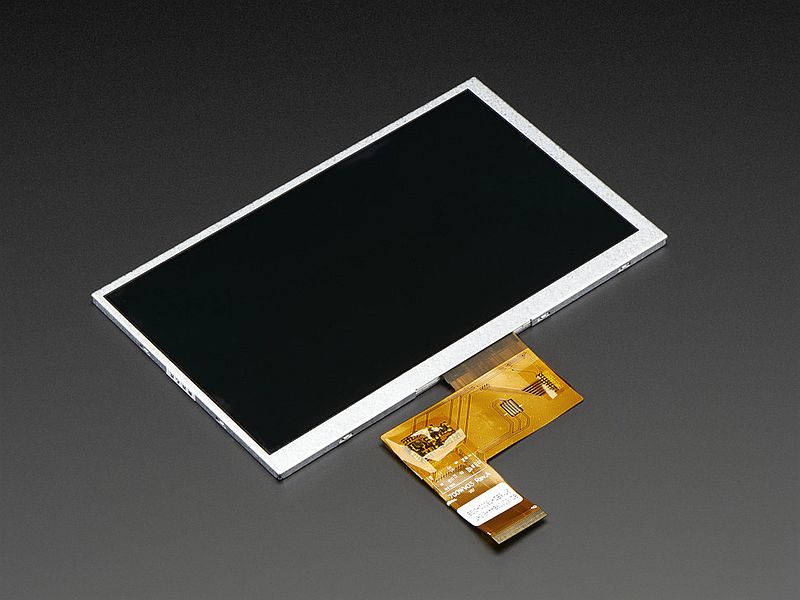
Now for a display. I suspected I’d find a 7″ monitor for cheap. And there were some made for automotive backup cameras, but nothing I really loved, wanted to work with, or wanted in my room. I ended finding this display and adapter combo:

The good is that it is a touchscreen, the adapter is intended to interface to Raspberry Pi, and there turns out to be a case for it. The bad is that it also costs more than I wanted to spend at $64. Rationalizing, we’re at around $100 again, but we have everything we need.
| Item | Cost |
|---|---|
| CanaKit with Raspberry Pi, power supply, WiFi, network, clock,… | $46 |
| 7″ Touchscreen | 64 |
| Total | $110 |
It’s $20 more than the low cost option, but gives us more flexibility. It’ll be cooler. Tech Is So Cool 😉
A Case for Our DIY Clock
In either approach we needed some kind of case or structure to contain all of our pieces. I was thinking of going the 20/20 aluminum extrusion route, adding some plexi-glass panels maybe. But the screen above has a case which fits it, and while it’s no museum piece in terms of design, it’s civilized enough to live indoors, it’ll do for now.

It’s another $28, and the 20/20 aluminum would have cost that too. The part I don’t like is that the back of the case is sold separately. There’s a shallow back and a deep back, depending on how much stuff you’re going to cram into it. I got the deep back just in case.
DIY Clock Hardware Decision
The order is in, it’s official. I’m just waiting to hear the Prime truck drive up and drop it off. Here’s what I’ll be building the DIY Clock prototype with:
| Item | Cost |
|---|---|
| CanaKit with Raspberry Pi, power supply, WiFi, network, clock,… | $46 |
| 7″ Touchscreen | 64 |
| Case for screen | 28 |
| Back for case | 7 |
| Total | $145 |
I decided it’s worth it if for no other reason than to get this project out of my head. It’s been nagging at me for a while. I can worry about getting the cost to a reasonable level later if it becomes important.
In the next post, we’ll unbox the hardware and get it set up to port our prototype over to it. It won’t be long until we see this thing in action!
1 thought on “DIY Clock-Weather-Plus Part 3”